I’m watching my weight and I’ve lost my grip!

Hi folks,

No, I’ve not enrolled in a weigh watchers class although I most probably could afford to shed a few inches from my waistline,Β  nor have I lost my tenuous grip on reality in this bizarre and frequently surreal world in which we live.

I’ve been giving even more thought to the gear that I carry and I decided to assess things in terms ofΒ  “is this bit of kit photographically mission-critical or not?”. I’ve applied this brutal logic to each and every item in my camera bag, large and small alike.Β  Is my camera rain cover essential or not?, how many times have I used it when I have weather-sealed camera body and main lens?, does it justify space and particularly weight in my bag?. So I’ve removed my add-on camera grip, it doesn’t improveΒ  my photographs and it saves a bit of weight, both in my bag and around my neck and I can just as easily operate the camera without it.

What was the last time that I used those filters?, do I really need to carry three spare batteries for a day out shooting?. How often do I have the need to use that lens?. My memory card case is waterproof and could probably survive being run over by a tank and/or dropped into the river, what are the chances of that happening? and does it need to be when it lives inside a waterproof, padded camera bag 99.99% of the time?, etc..

It pleasantly surprised me just how much weight saving there is to be had by applying this simple logic to one’s gear. And, perhaps the biggest question of all, how many times have I returned after a shoot thinking, “I’m so pleased that I took this or that bit of kit with me”? as opposed to “well, it can stay in my bag as it’ll come in handy one day” by which time I’ve carried it around on foot over a period ofΒ  time for hundreds of miles like a camera accessory manufactures’ pack mule.

There’s an old English saying “Look after the pennies and the pounds’ll look after themselves”. I have my own version of this “Look after the ounces and the pounds (weight) will look after themselves”. πŸ™‚


Best wishes,

Leigh


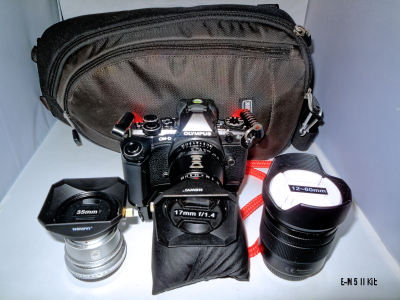
My camera gear and new camera bag, travelling ultra light – approx. 1.5 Kg (3 lbs) total weight!.

Hi everyone,

I’ve manged to get the total weight of my camera gear down to about 1 Kg. Olympus OM-D E-M5 Mk II + Fotodiox grip, battery and memory card fitted (550 g)Β  M.Zuiko 9-18 mm (approx 155 g), M.Zuiko 25 mm 1.8 (approx 136g) and Panasonic Lumix 12-60 mm (approx 210 g) and including my new thinkTANK Turnstyle 10 v2 sling bag (400 g) and few essential, such as spare batteries, memory cards, lens wipes and my thinkTANK Emergency camera rain cover, approx 1.5 Kg!.

I own or have seen faster and debatably sharper lenses but I’ve not seen sharper, faster and lighter lenses and certainly not a price point that I can afford or justify. The 12-60 mm is also weather-sealed to compliment my camera’s weather sealing. I chose the Fotodiox grip in preference to Olympus’Β  own grip as it doesn’t need to be detached and re-attached every time to change the camera’s battery.

My kit, chosen for it’s weight, size and focal length coverage to suit my photographic interests, which as I guess most of you already know are travel/landscapes.

summer 2020 gear new small
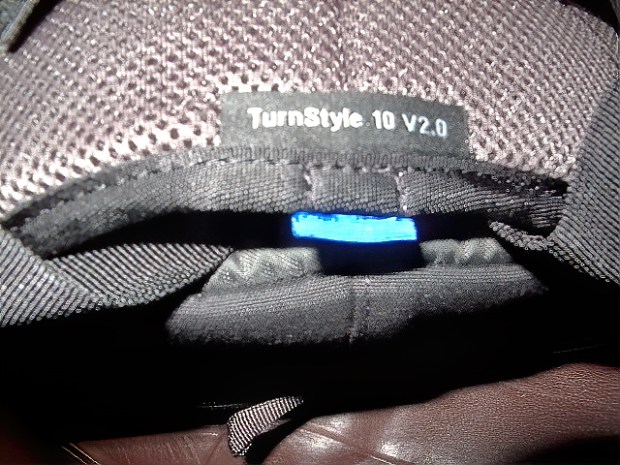
The bag seems like it’ll be perfect for my day-to-day requirements. Heaven knows I’ve tried all types of bag, shoulder bags, backpacks etc. and they all hurt. Could this be the one?!. The strap is nicely shaped and well padded.

TURNSTYLE 10_1

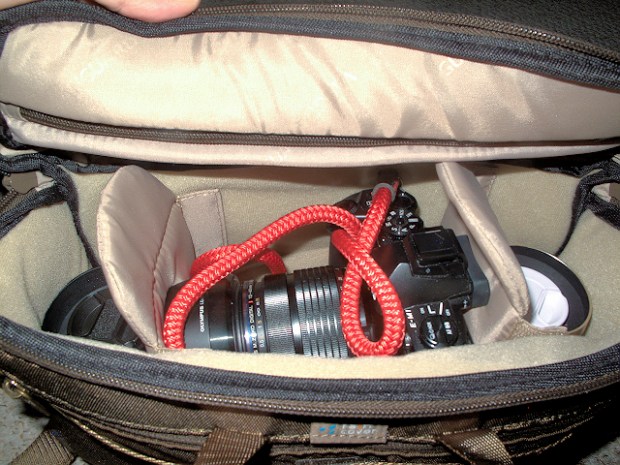
Main compartment, easy access to my gear. I’ve added a HeroClip to the top loop to easily hang it up or suspend it from a tripod hook. I really like the idea of swinging the bag round and my gear is right there where I want it.

TURNSTYLE 10_2

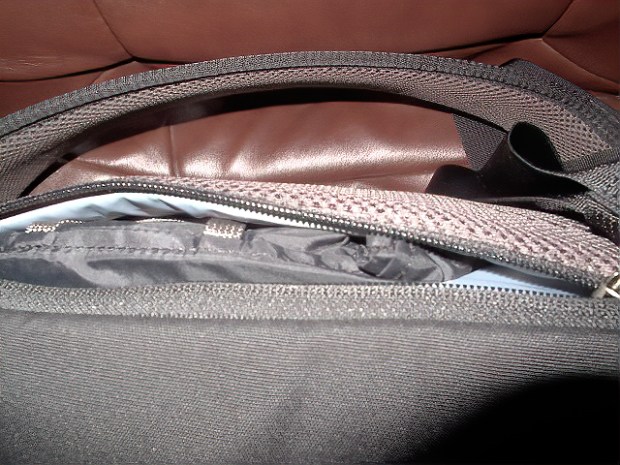
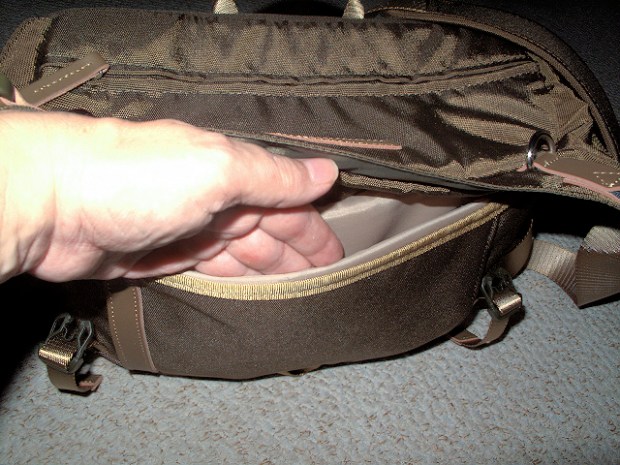
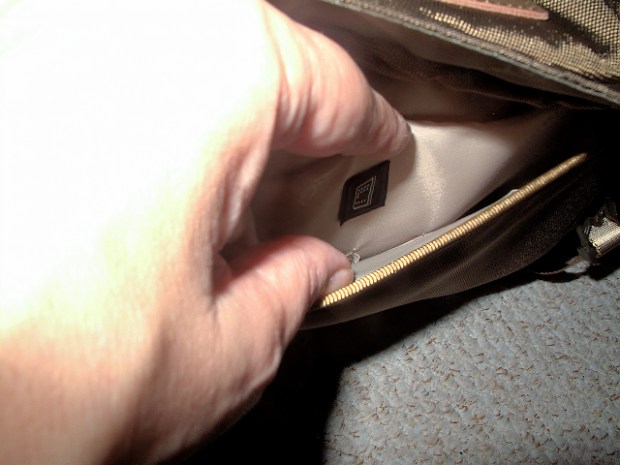
Rear compartment will hold an 8 inch tablet but is ideal for stashing myΒ thinkTANK emergency camera rain cover which could also hang from the HeroClip to dry out when required.

TURNSTYLE 10_3

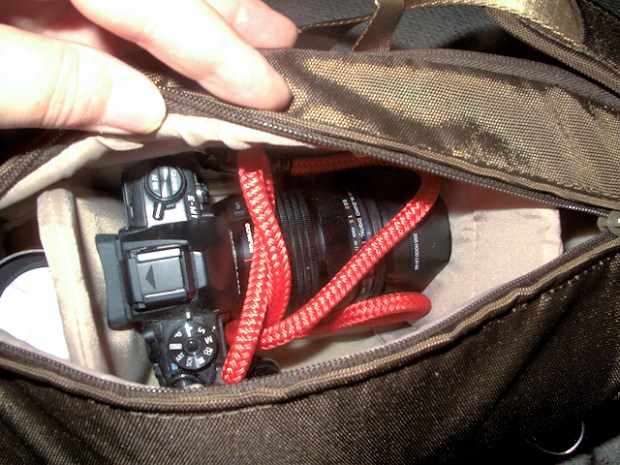
Main compartment for my camera and my choice of lenses. There’s also a horizontal stacking divider provided but I’m not currently using it.

TURNSTYLE 10_4

Another inside compartment, maybe for some paperwork, travel documents or suchlike.

TURNSTYLE 10_5

Front compartment comprising of three pockets for myΒ  filters, lens wipes, memory cards etc. and a larger front section in which you can just see my NEEWER battery case which is holds four Olympus BLN-1 batteries perfectly and securely.

TURNSTYLE 10_6

End compartment housing the bag’s rain cover, shown with the waist strap ends tucked in. I think that the addition of the waist strap to the V2 is a very useful feature to stop the bag swinging around on the move.

TURNSTYLE 10_7

Ultimately I don’t know how this bag will work out but I hope that my shoulders, back and neck will thank me for it. :).

Kind regards

Leigh

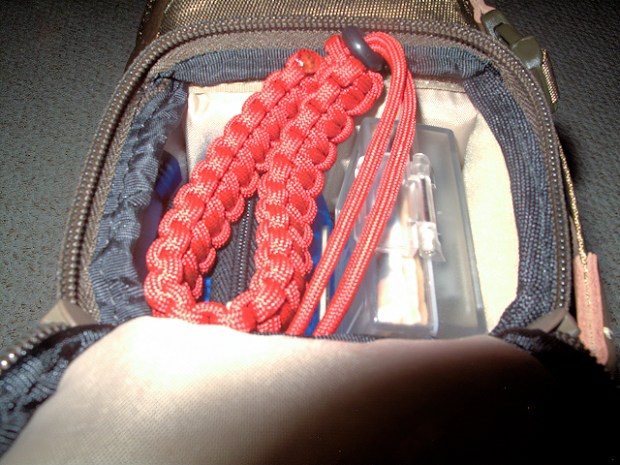
PS. A while back I started using Cordweaver camera straps.Β like the red one shown in this post.


Simply Red

Hi everyone,

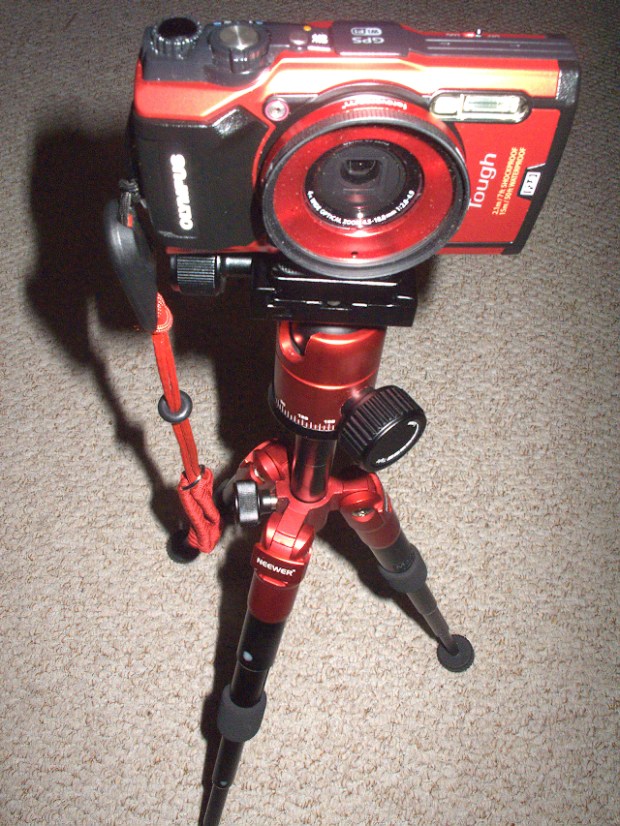
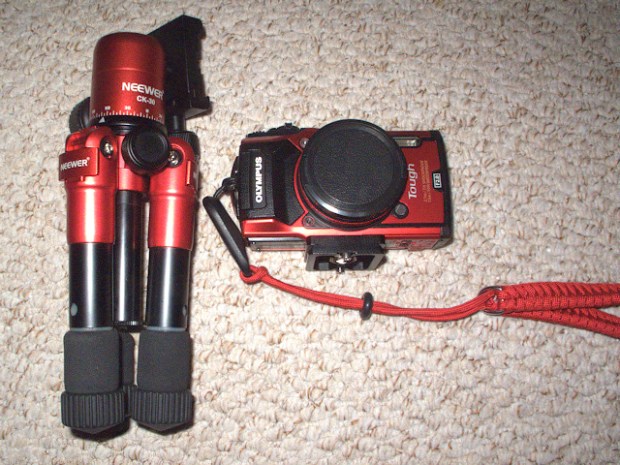
For the days when I just want to travel ultra light. My Olympus Tough TG-5 and Neewer 20 inches/50 centimeters Portable Compact Desktop Macro Mini Tripod with 360 Degree Ball Head very, err, “red”. πŸ™‚


Simply Red 1Simply Red 2

Kind regards

Leigh

The best of both worlds : Swapping between Cokin filters and circular filters using Manfrotto XUME adapters.

Hi everyone,

Some while back I invested in, and invested is definitely the right term as they’re not cheap, in some XUME adapters for my round, screw-on filters. I’ve gotten so used to simply and quickly changing filters without all the screwing/unscrewing and risk of a cross threading etc.. The XUME system uses a magnetic adapter ring that screws into the front of the lens, while the filter itself screws into a metal filter holder.

Recently I decided to buy a Cokin P-Series filter set containing filter holder, four of their adapter rings (52 mm, 55 mm, 58 mm and 62 mm) and three ND filters. Great on their own but here’s the problem I encountered and my solution.

First the problem, as I wanted to quickly change between using aΒ  screw on circular B+W clear glass protection filter plus the proprietary lens hood and the Cokin system this is what I was having to do as it was impossible to easily swap because the outer diameter of the Cokin ring prevented the hood simply being reversed and fitted/re-fitted without screwing in/unscrewing the Cokin adapter ring every time.

So to fit the Cokin holder I’d first have to reverse or remove the lens hood then remove the circular filter complete with both halves of the XUME system and then screw in the Cokin ring and snap on the Cokin filter holder and the same in reverse when changing back the other way. Slow and fiddly and always the chance of a mishap along the way especially on a cold winter’s morning with cold hands!.

My solution is very simple, I fitted one of my XUME filter adapters to the Cokin ring. So to change over simply reverse or remove the lens hood, pull off the circular filter withΒ  XUME filter adapter attached and attach the Cokin holder complete with its adapter ring and XUME lens adapter fitted. There’s very little weight in the Cokin system so practically no chance it’ll become easily detached providing one exercises due care and attention .

Cokin and XUME 1

Cokin and XUME 2

Reverse hood, pull off circular filter, push on Cokin filter holder and vice-versa, very quick!, tested with my Olympus 12-40 PRO lens (62 mm filter thread) @ 12 mm with no vignetting. πŸ™‚

  1. 62 mm XUME lens adapter fitted directly to lens.
  2. 2 x 62 mm XUME filter adapters, one fitted to circular filter and one fitted to Cokin 62 mm adapter ring.

Best wishes,

Leigh


Focus bracketing and HDR landscapes.

Hi everyone,

Lately I’ve been experimenting with focus bracketing and combining with HDR. For quite a while now I’ve been using Skylum Software’s Aurora HDR 2019 with very good results. I set off recently to one of my favourite locations, Bushy Park, to deliberately shoot focus bracketed shots as well as HDR of the same scene.

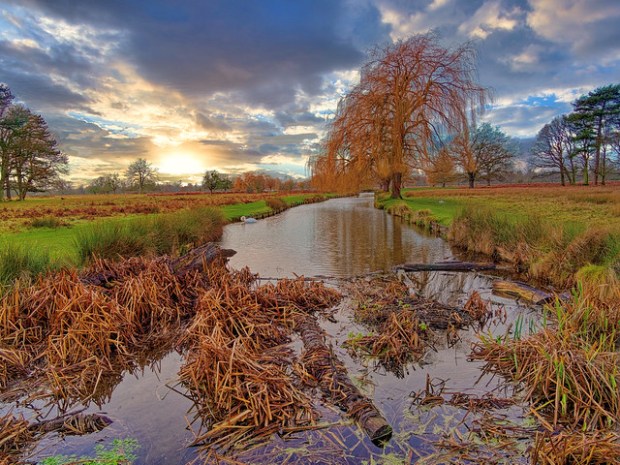
I typically shot 3-4 focus bracketed shots and another three frame HDR at +/- 2EV. I processed the HDR in Aurora to my tastes as usual and used Affinity Photo’s focus merge feature to merge the focus bracket shots as well as the HDR from Aurora. I then edited further in some of my other software including Skylum’s Luminar 4. Here’sΒ  few results from my experiments. Tack sharp front to back and HDR.

OLYMPUS DIGITAL CAMERA

OLYMPUS DIGITAL CAMERA

49368267641_438f55115b_z

49369058701_3530b2c0fa_z

49373014997_06c88ea0bd_z

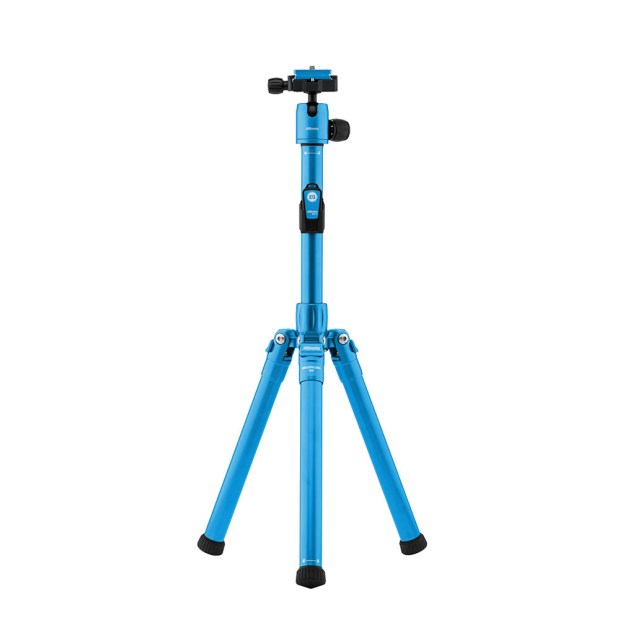
I know that this will surprise regular visitors to my blog who know how much I hate them but I actually took a tripod, specifically for these experiments. Unfortunately it was, as usual too heavy and cumbersome and I returned home, on foot as usual, with quite severe aches and pains in my back and shoulders after carrying it around for about five orΒ  six hours so I’m not taking it again but I might have found an interesting alternative, the MeFoto Backpacker Air tripod which weighs only 2 lbs and is ideal for my Micro Four Thirds gear. Quick to setup and at only 10.4 inches in length when collapsed it should also fit neatly in my Vanguard VEO GO34M camera bag.

BPAIRBLU_main

Image: https://www.mefoto.com

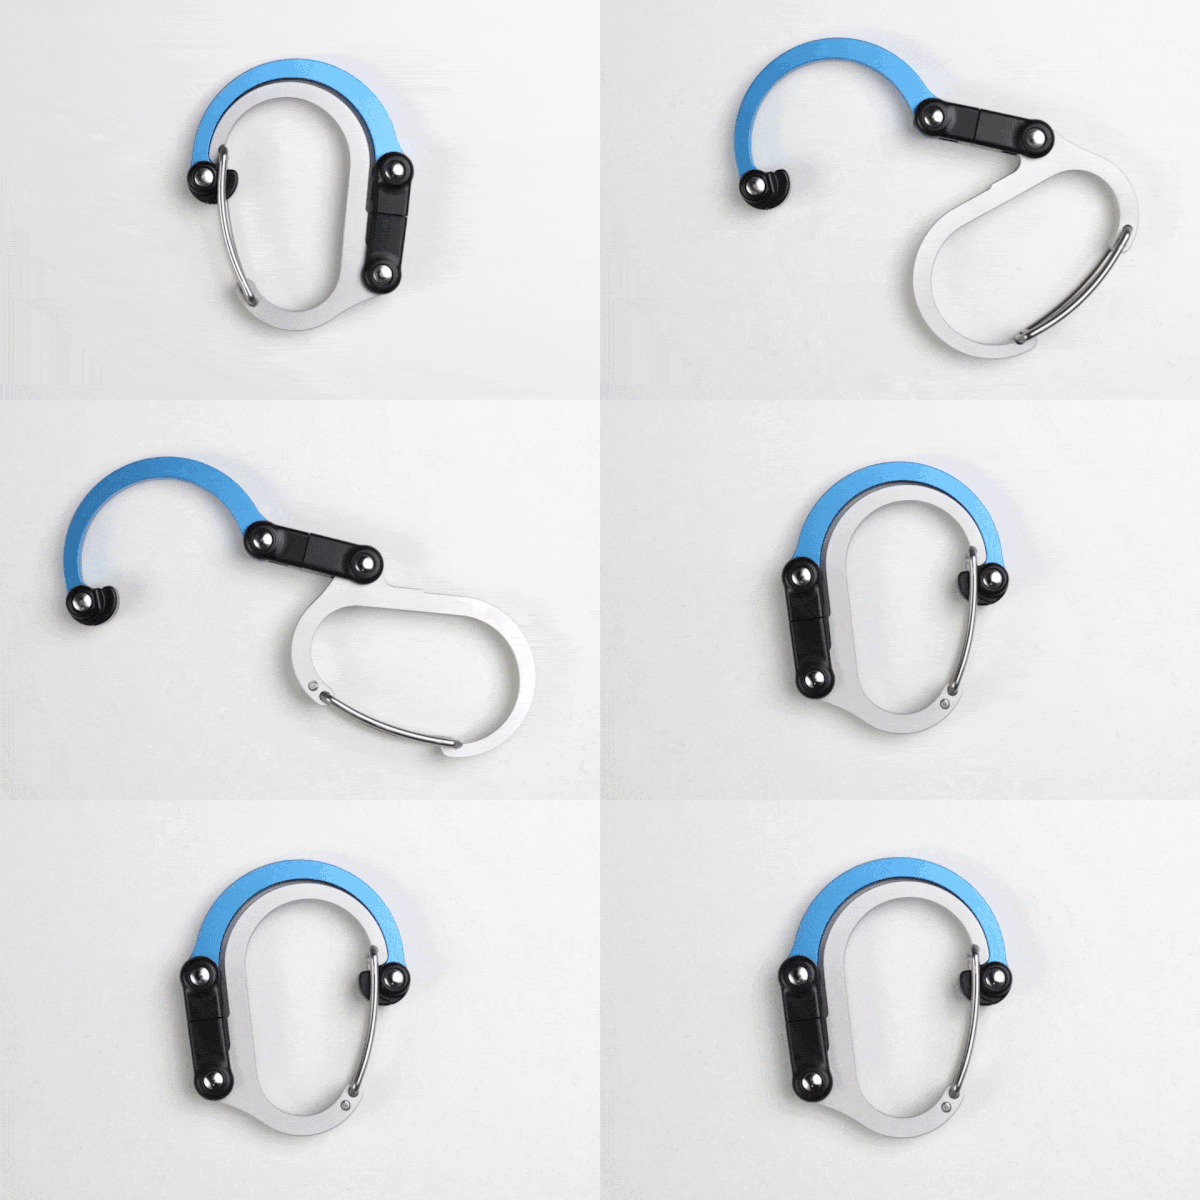
I bought one of these ingenious Hero Clips so that I could easily hang my camera bag or another weight from the tripod’s weight hook for extra stability. I guess that you could hang just about anything from it. Note it is not safe for rock climbing etc..

heroclip_homepage_grande.gif

Image: https://myheroclip.com/

Kind regards

Leigh


ThinkTANK Emergency Rain Cover revisited.

Hi everyone,

I guess there’s no perfect solution when it comes to rain covers. I’ve had this rain cover for a while now. It’s the best solution that I’ve found in terms of size, manufacturing quality and portability. It comes with its own storage pouch with a loop and I’ve attached a carabinerΒ  so that it can hang from a d-ring on my camera bag if required. When the cover is wet it is nice to have a self-contained pouch to stuff it back in to and keep it separate from other gear.

IMG_0553 -1.jpg

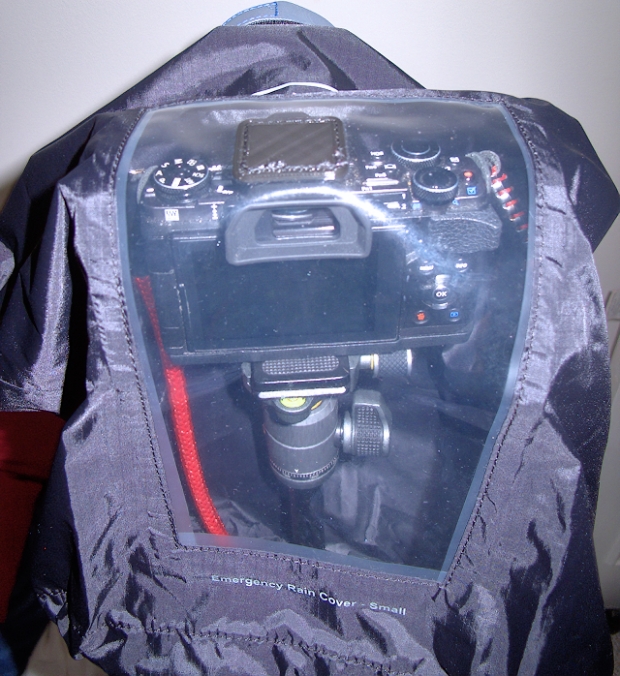
Fitting is pretty straightforward, slip the camera in and attach to the camera’s hot shoe and then tighten the cinch strap around the lens hood. Even though I bought their small sized rain cover to suit my micro four thirds gear I find that the strap is still a bit big for most lens hoods but it does the job.Β Fitted here to my Olympus OM-D E-M5 mk2 with Lumix 12-60 mm lens.

IMG_0542 -1

There’s good room inside to get both hands in to operate the camera controls/tripod adjustments and the large transparent top/back panel affordsΒ a good view of the LCD screen etc..Β  There’s also a draw cord at the base of the cover.

IMG_0545 -1

All-in-all it has proved useful on a number of occasions, it weighs next to nothing andΒ is a worthwhile addition to my camera bag.

Kind regards

Leigh


Another day, another camera bag :) -Vanguard VEO GO34M KG SHOULDER CAMERA BAG (and VEO 2 GO 204AB TRIPOD)

bag scale

What’s in my bag?

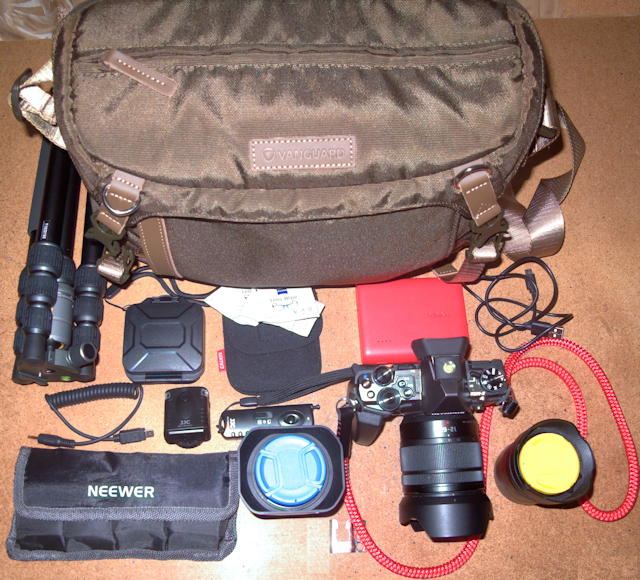
BAG AND GEAR SMALL

Hi everyone,

My quest,Β  (readΒ obsession),Β  to find a “perfect” camera bag recently moved a step closer. πŸ™‚ . Whilst visiting Chester I came across a very nice lightweight, well-padded camera bag by Vanguard designed specifically for Micro Four Thirds kit. If you’re into full-frame DSLR kit and large lenses then “this isn’t the bag you’re looking for” Β Β  but, if like me, you prefer to travel as light and compact as possible then read on.Β 

Manufacturer’s specifications:

Internal Dimensions 340 Γ— 105 Γ— 230mm
Outside Dimensions 355 Γ— 130 Γ— 250mm
Weight 0.7kg
Internal Tripod Compartment Yes – Tripods up to 33cm

VEO GO34M KG SHOULDER CAMERA BAG – KHAKI-GREEN

Front: Adjustable webbing shoulder strap, shoulder pad and carrying “grab” handle and two “D” Rings for attaching accessories. It has one of the most comfortable shoulder pads that I’ve come across. The bag is also available in black but I really like the styling of the khaki-green version.

IMG_0475 -1_DxO-Edit-fullframe

Front pocket with two compartments. Rear compartment will take a 9.7 inch tablet, I know, I’ve tried it with my Samsung Galaxy SM-T560 tabletΒ Β and the front compartment has two small (pen sized) and two larger pockets to take other accessories. Personally, a very small thing but I’d have liked to have seen three of the larger pockets as I think they’d ultimately be more useful.

IMG_0477 -1_DxO-Edit-fullframe

IMG_0478 -1_DxO-Edit-fullframe

I really like the top entry to the camera compartmentΒ  allowing access to the gear without having to remove the bag from one’s shoulder and the compartment can also be accessed by a zipper which runs around the bag. The bag comes with three velcro dividers but I’m currently using two as I like to carry a camera with a lens attached. OM-D E-M1 Mk 1 with 12-40 mm zoom attached plus 17 mm and 25 mm prime lenses. If you’re interested in them I did a post onΒ Cordweaver neck and wrist straps.

IMG_0479 -1_DxO-Edit-fullframe

IMG_0484 -1_DxO-Edit-fullframe

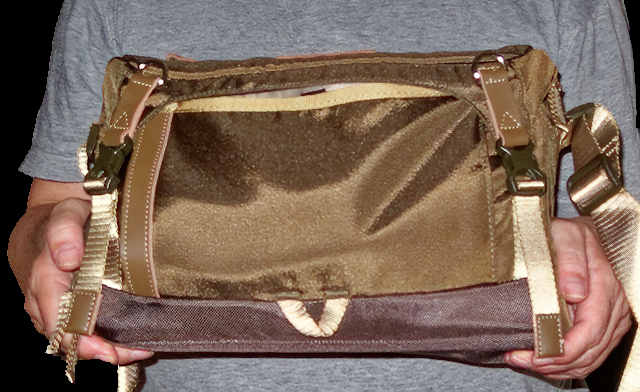
Rear of the bag with zip compartment housing the supplied rain cover and a strap with centre fixing velco to hang from roller luggage.Β  There’s also some space in this compartment close to one’s body, for a passport, wallet, documentation etc.

IMG_0480 -1_DxO-Edit-fullframe

bag case

IMG_0481 -1_DxO-Edit-fullframe

Rain cover fitted, I like it that it goes right under the bag, enabling the bag to be put down on a wet surface. Another nicely thought out feature is that the rain cover is attached to the bag by a strap which can be detached or left to dangle from the bag to dry out when required.

IMG_0483 -1_DxO-Edit-fullframe

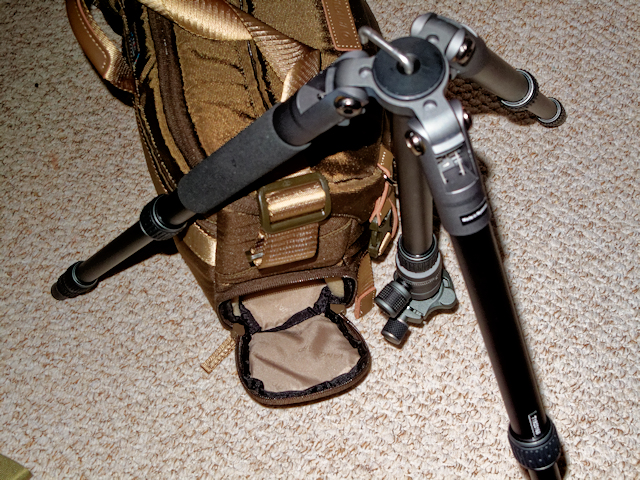
The bag has a full-width compartment which can house a compact tripod (check the spec. on their website) or maybe a long lens. I’m using it for a rainproof jacket, my small TG-5 backup camera and spare camera batteries etc..

Although designed specifically to house a tripod I’d like to have seen the same access on both end of the bag as, when stuffed with other gear, it’d be easier to get to the contents without having to unpack stuff.

IMG_0487 -1_DxO-Edit-fullframe

In conclusion, a very well designed and versatile camera bag that ticks a lot of my boxes.

Kind regards

leigh sig 2

Caution: make sure you get their VEO 2 GO range and NOT their VEO 2 range else it will not fit the bag.

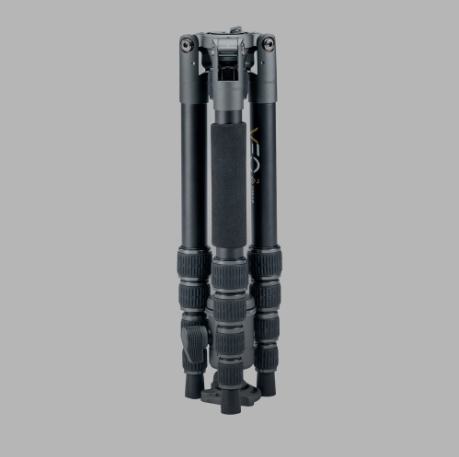
PS. I’m not a fan of tripods as they don’t normally suit my style of photography. They’re additional weight to carry around all day, one more thing to be hung from one’s shoulder or strapped to the camera bag and they take time to setup and pack away,Β  despite the above I’m considering getting one of these:Β Vanguard VEO 2 GO 204AB ALUMINUM TRIPOD WITH BALL HEAD – RATED AT 6.6LBS/3KGΒ . This will inconspicuouslyΒ go in to the bottom compartment of the bag and weight only 2 lbs.

I suspect that I’ll end up carrying it around and using it very occasionally but it comes in at a very tempting price (at the time of writing at Amazon for Β£64 UK), seems very well designed with many good features including fast setup and it might come in handy on the odd occasion.

It also seems to me to be more than a bit bizarre to go to lengths to choose a bag which doesn’t scream “camera gear inside” and then either carry or strap a camera tripod to it, another feature of the bag that I really like as next to nobody is going to know that I’m carrying a tripod and thus camera gear.

tripod

Tripod with center column inverted and at its shortest length in the transportation orientation and one (of three) twist-lock leg sections extended showing hook for adding weight for extra stabilisation.

tripod and bag 3.jpg

Now you see it…

tripod and bag 1

and now you don’t…

tripod and bag 2

Me?, carry a tripod?, what tripod?!

Cordweaver camera neck and wrist straps.

Hi everyone,

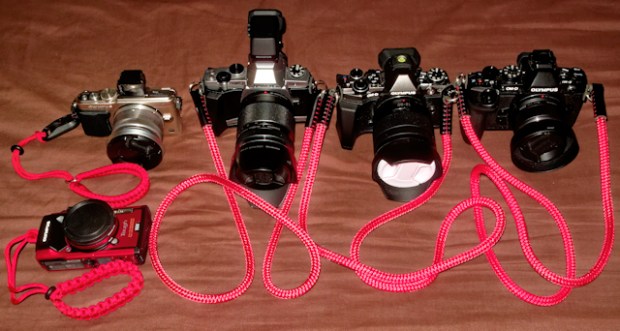
I’ve standardised on these great camera neck and wrist straps by a company called “Cordweaver” – https://www.cordweaver.co.uk/Β . The straps are very light and strong and are available in a choice of two colours, red and black and various lengths, the leather ends are hand-sewn with strong polyester waxed thread. Connection to the camera is via the fitted 16mm diameter split rings and the wrist straps are made out of Type III 550lb Paracord with 7 internal strands.

Great service, very quick dispatch and very high quality merchandise. I used one on my EM-1 and one on my TG-5 for my recent trip to Porto and it was great, so good I’ve since bought another three,Β  πŸ™‚ very comfortable to wear and strong and it would be very hard to cut through should someone try and grab the camera.

cordweaver straps

Additional: The wrist straps come in two types, with Peak Design style connectors (as fitted to my EPL-5 on the top left) and, without, (as fitted to my TG-5). It is also supplied with a spare Peak Design connector, a nice touch.

Lastly, I really like how flexible they are and tuck in nicely in my camera bags unlike some of the stiffer and more bulky neck straps I’ve used. The wrist straps act like slip knots at either end so they tighten at both the camera end and the wrist end should the camera slip from your grip, the addition of a rubber grommet is another nice feature.

Kind regards

Leigh

Skylum Software latest free update for Luminar 3 (v3.1.0) with Accent AI 2.0

Hi everyone,

Here it is the latest update for Luminar 3Β Β  including the newΒ Accent AI 2.0 feature. and a host of other new useful features. I’ve been fortunate to have been testing a beta release of these features for a few days now and they are great.

You’ve got to love these guys πŸ™‚

Changelog:

Luminar Updates for Windows Users

The Windows version of Luminar receives several updates with version 3.1.0 We hope you enjoy this new release of Luminar and appreciate your feedback and reports.

New features

IMPORT IMAGES.Β You can now import images from a memory card or hard drive and copy them to a folder. You can also choose to include subfolders when importing

SMUGMUG SHARING.Β The ability to post images to SmugMug has now been added to Luminar for Windows.

SHORTCUTS.Β Folders and user albums can be added to the Shortcuts list. Just right-click for a context menu or drag & drop them into the list.

IMPROVED SELECTIONS.Β Want to choose a range of photos in the Gallery view? Try the Shift or Ctrl key to select a range or group of images. You can also deselect images from a multiselection by Ctrl+clicking on an image.

ROTATE IN GALLERY. Images selected in the gallery can be quickly rotated left or right by 90 ̊increments with no need to switch to edit view. Just use the Image > Rotate menu or just right-click.

PHOTOSHOP ELEMENTS SUPPORT.Β We’ve added Photoshop Elements support to the Windows platform. Just choose the Install Plugins command if you want to load Luminar as a plugin. For future versions of Luminar, plugin users should switch to Luminar Flex.

Performance Improvements

Get additional speed and performance from the Luminar update.

IMPROVED HISTORY.Β Undo a Sync/Copy/Paste adjustments with one step in the History list.

HIDDEN FILES.Β Luminar does a better job of filtering hidden folders and photo. Additionally, unwanted items like Backups, History, Previews, and Caches won’t be shown when opening Luminar Catalogs.

Luminar Updates for Mac Users

Several performance improvements, as well as new features, await Mac users. We hope you enjoy this new release of Luminar and appreciate your feedback and reports.

PROGRESS BAR.Β Keep better track of what’s happening when working with Luminar. You’ll see a progress bar when using tools like Erase or when running Luminar as a third-party filter.


Kind regards

leigh sig 2

Our fridge is a shrine :)

Hi everyone,

Our fridge-freezer has gradually turned into a shrine. My wife is a huge Elvis fan. Hang on, I could have phrased that better, by that I mean she’s a huge fan of Elvis. πŸ™‚ . Oh and somehow we’ve managed to squeeze in a few momentos of our travels but, sadly, not as yet, one of Graceland.

OLYMPUS DIGITAL CAMERA

Original shot (no white balance correction applied) –

OLYMPUS DIGITAL CAMERA

I really took this shot at ISO 6400 to demonstrate the incredible power of Topaz DeNoise AI in getting rid of noise. I don’t usually shoot at such high ISO settings but it’s a valuable tool in my software toolbox box for the occasions when I have to.

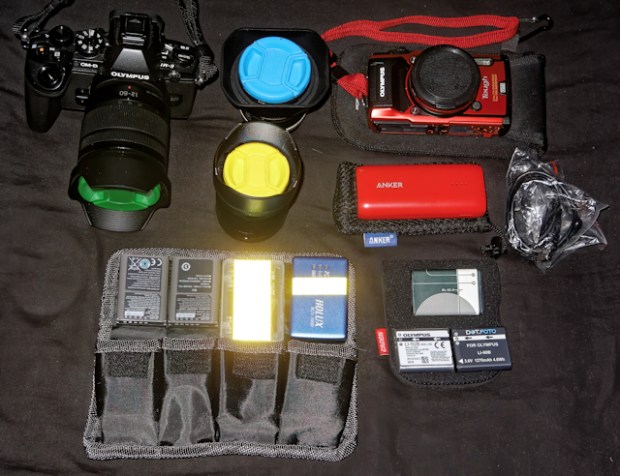
I’ve also finalised the gear for my next trip with the emphasis as usual very much on weight, total weigh of bag and gear, approx. 2.5 Kg!.

travelling gear new with tg-5 small

Olympus E-M1, Lumix 12-60 mm, M.Zuiko 9-18 mm, Lumix 12-35 mm. Olympus tough TG-5 and Forevercam,, Anker Astro 6700 mAH powerbank and cable, Newer battery case, 2 xΒ  E-M1 batteries, memory card case, Holux data logger, spare Holux battery and 2 x spare TG-5 batteries. All I need to travel light.

newgear2

newgear1

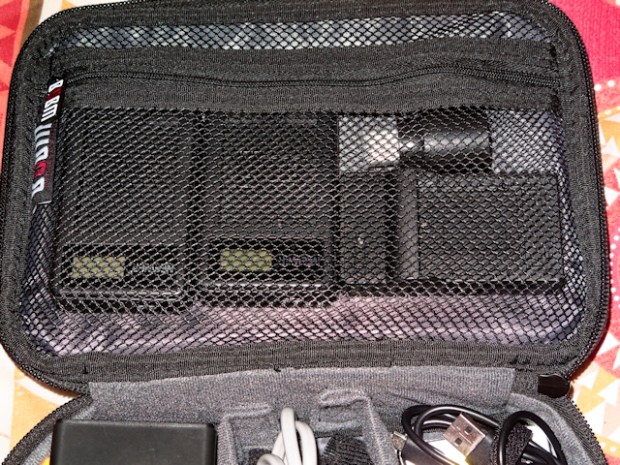
BUBM case, 2 x USB charger for EM-1 batteries, USB charger for TG-5 battery, Anker five-port USB charger, Olympus backup/USB charger for TG-5, mains cables, USB cables, memory card case, USB LED torch.

Best wishes,

leigh sig 2