Hi everyone,
Skylum have a new product which could be of interest to anyone involved with drone photography.

Skylum Software products US$10 discount code – LEIGH10SKYLUM
Kind regards


Hi everyone,
Skylum have a new product which could be of interest to anyone involved with drone photography.
Skylum Software products US$10 discount code – LEIGH10SKYLUM
Kind regards
Hi everyone,
I have setup a permanent 15% discount coupon code which can be used on all Topaz Labs products. The code is leightopaz. If you are wishing to use the code please us my Topaz Labs affiliate link and apply the code at the checkout.
Kind regards
Hi everyone,
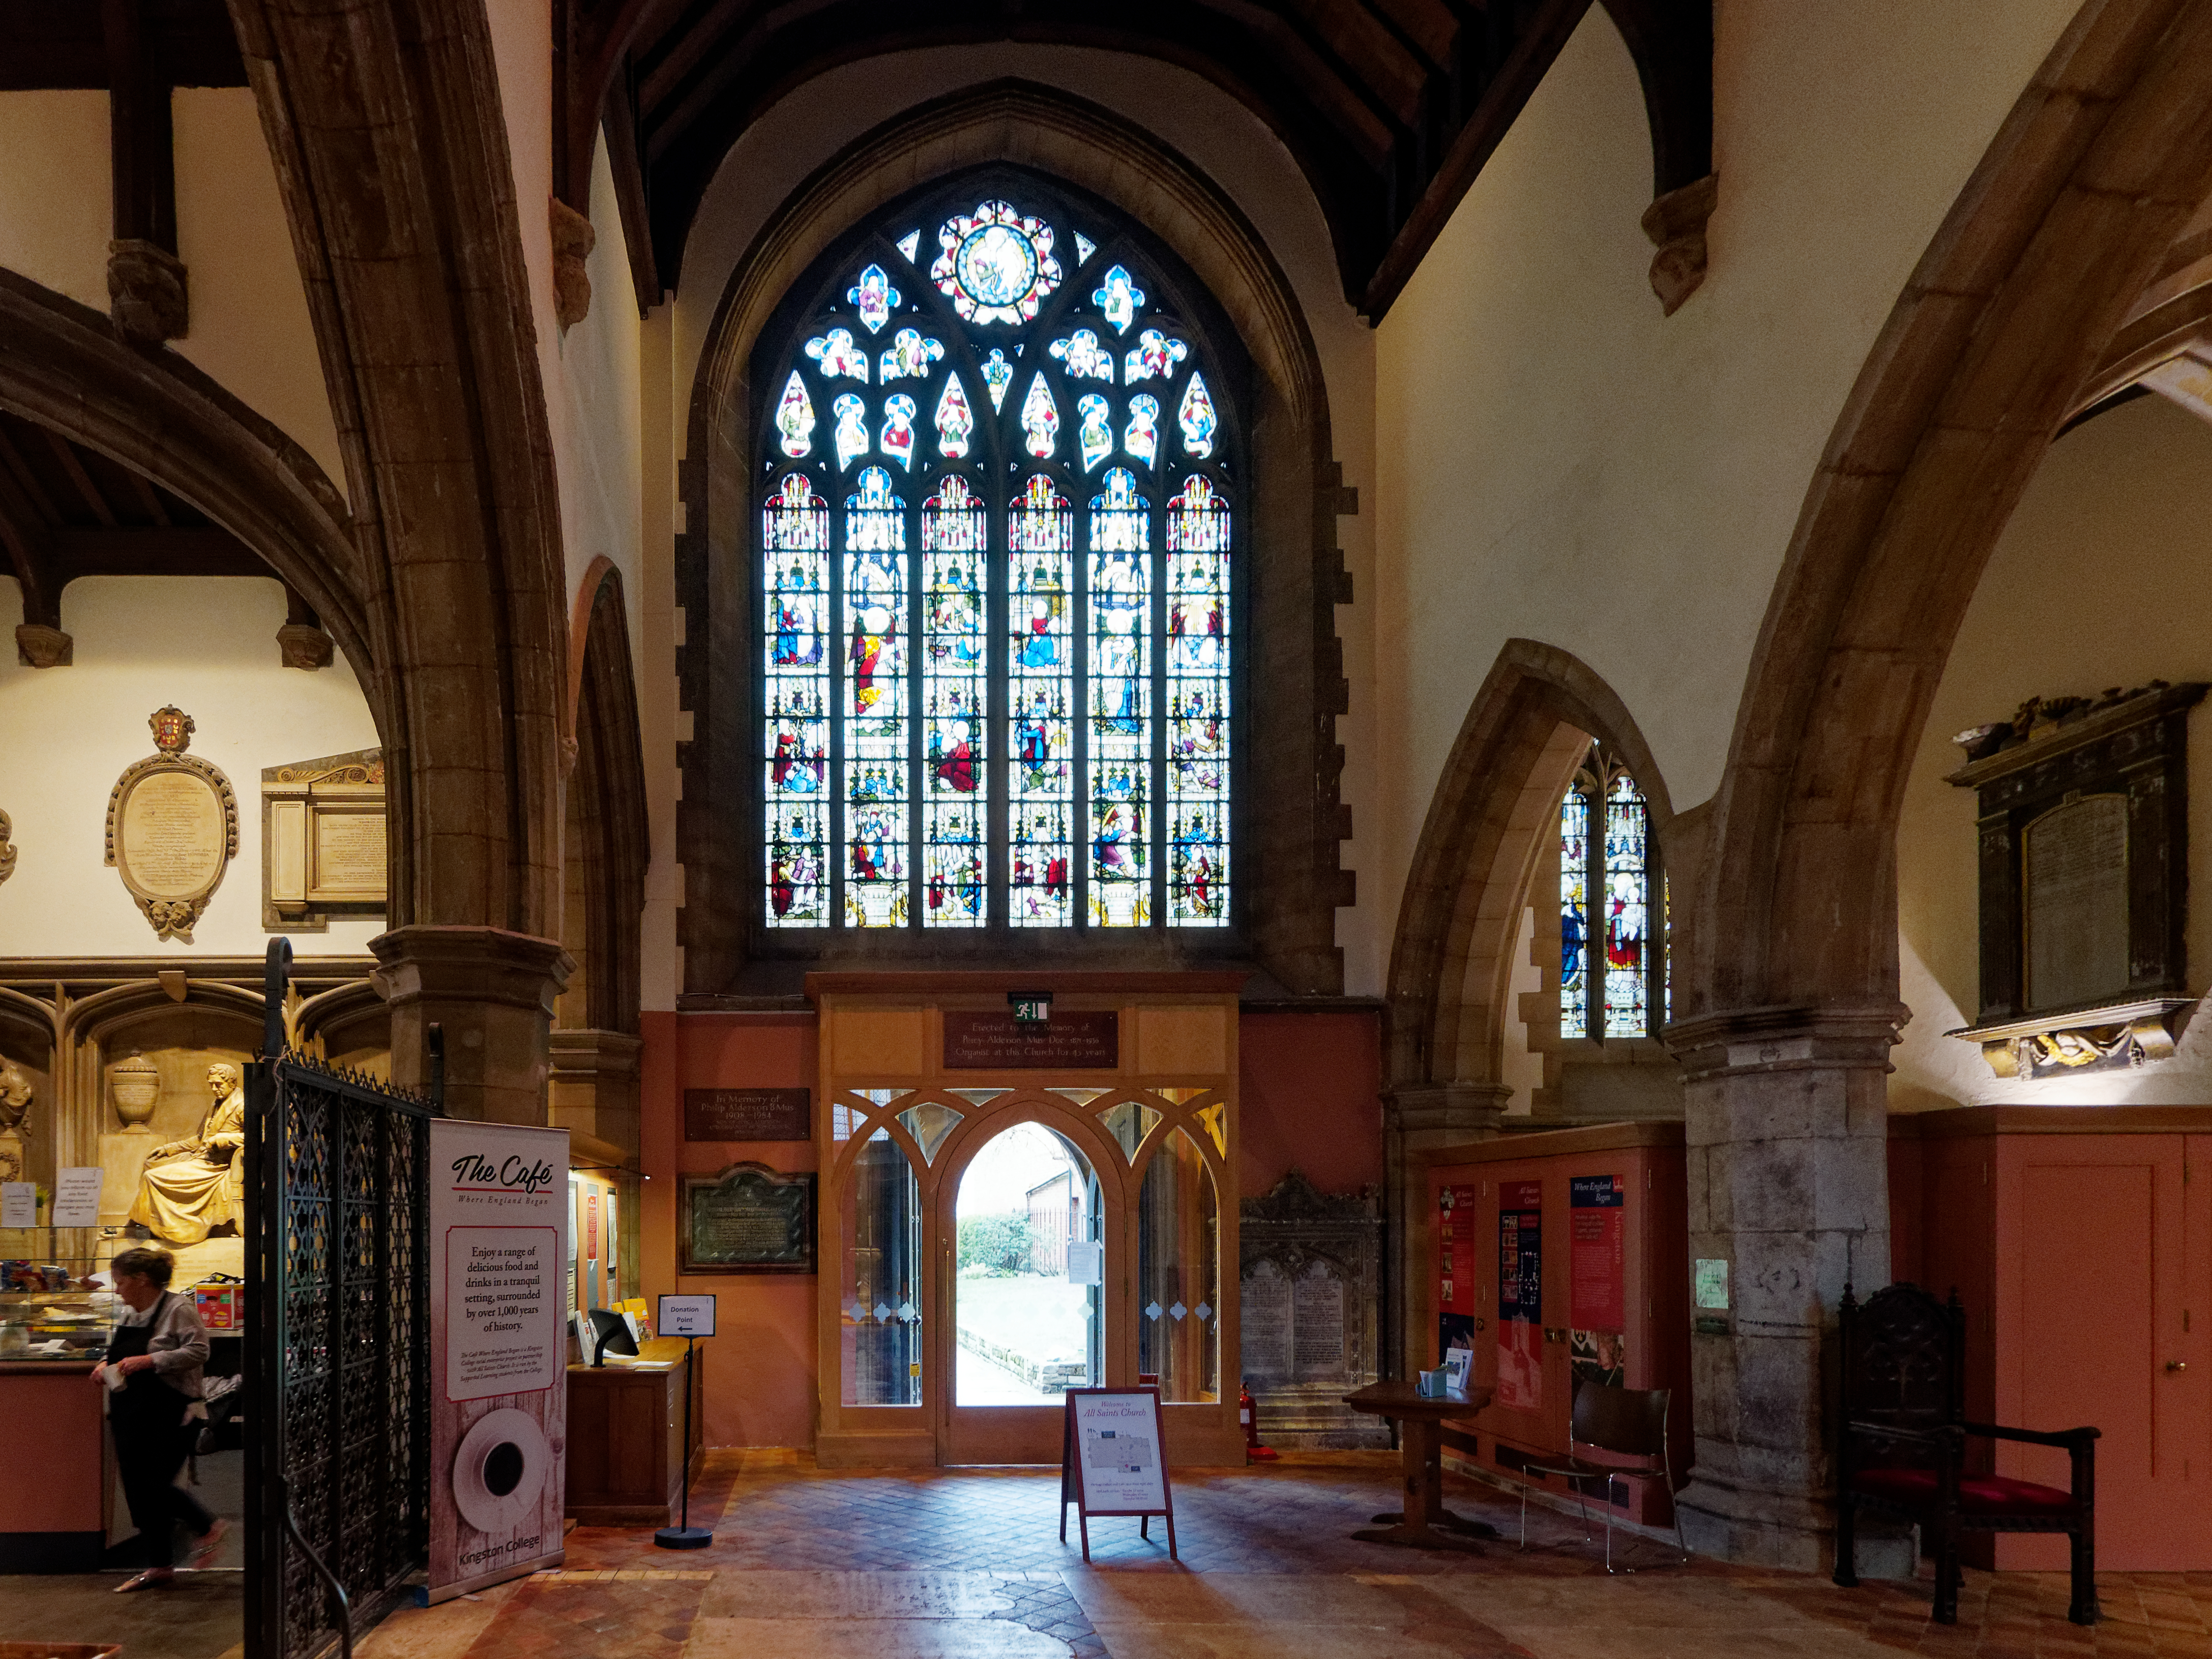
I thought I’d post a workflow example using one of my shots from my recent visit to All Saints Church, Kingston Upon Thames.
Original image.

Lens corrections and corrected verticals in DXO PhotoLab 2 + Viewpoint 3, my standard RAW editing software.
As this image was shot at ISO 1600 I used Topaz Labs’ A.I Clear to remove the noise, more apparent in the full sized crops below.
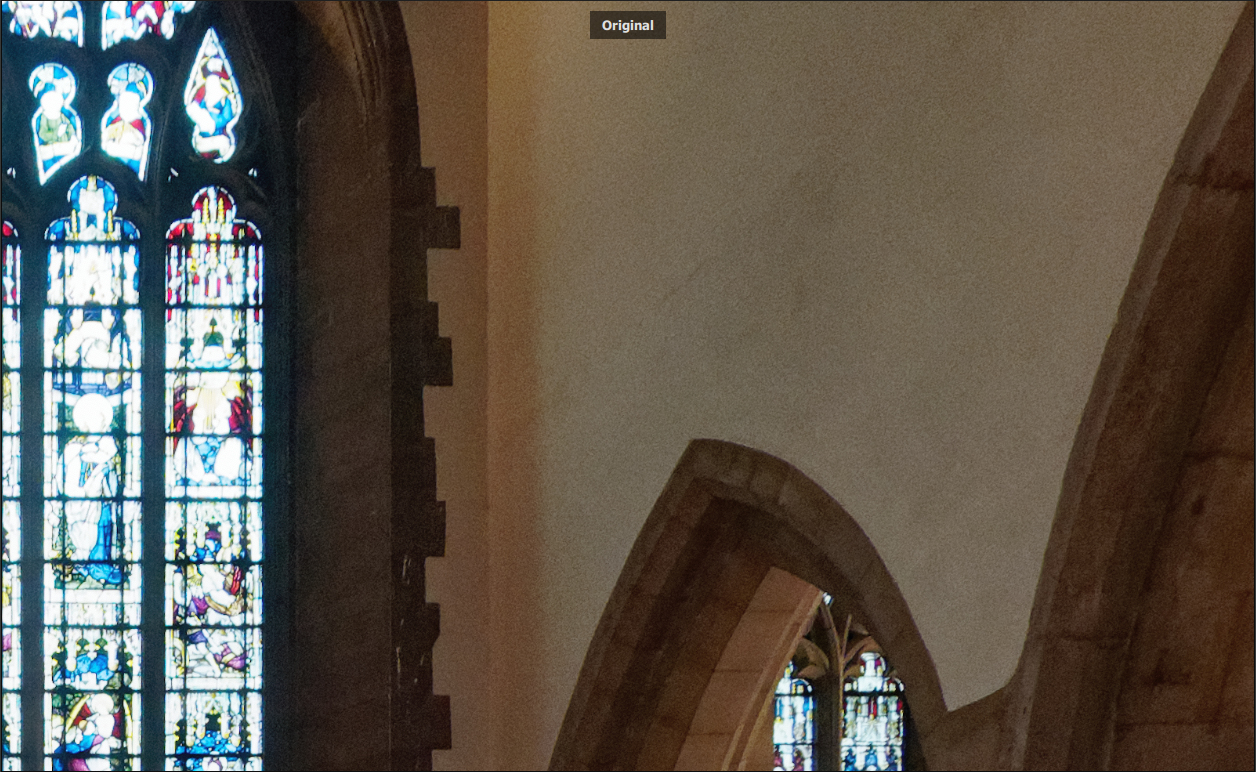

After A.I clear
Sharpened using Topaz Labs’ Sharpen A.I. The effect is quite subtle but noticeable in full size image. Full sized crops:


After Sharpen AI
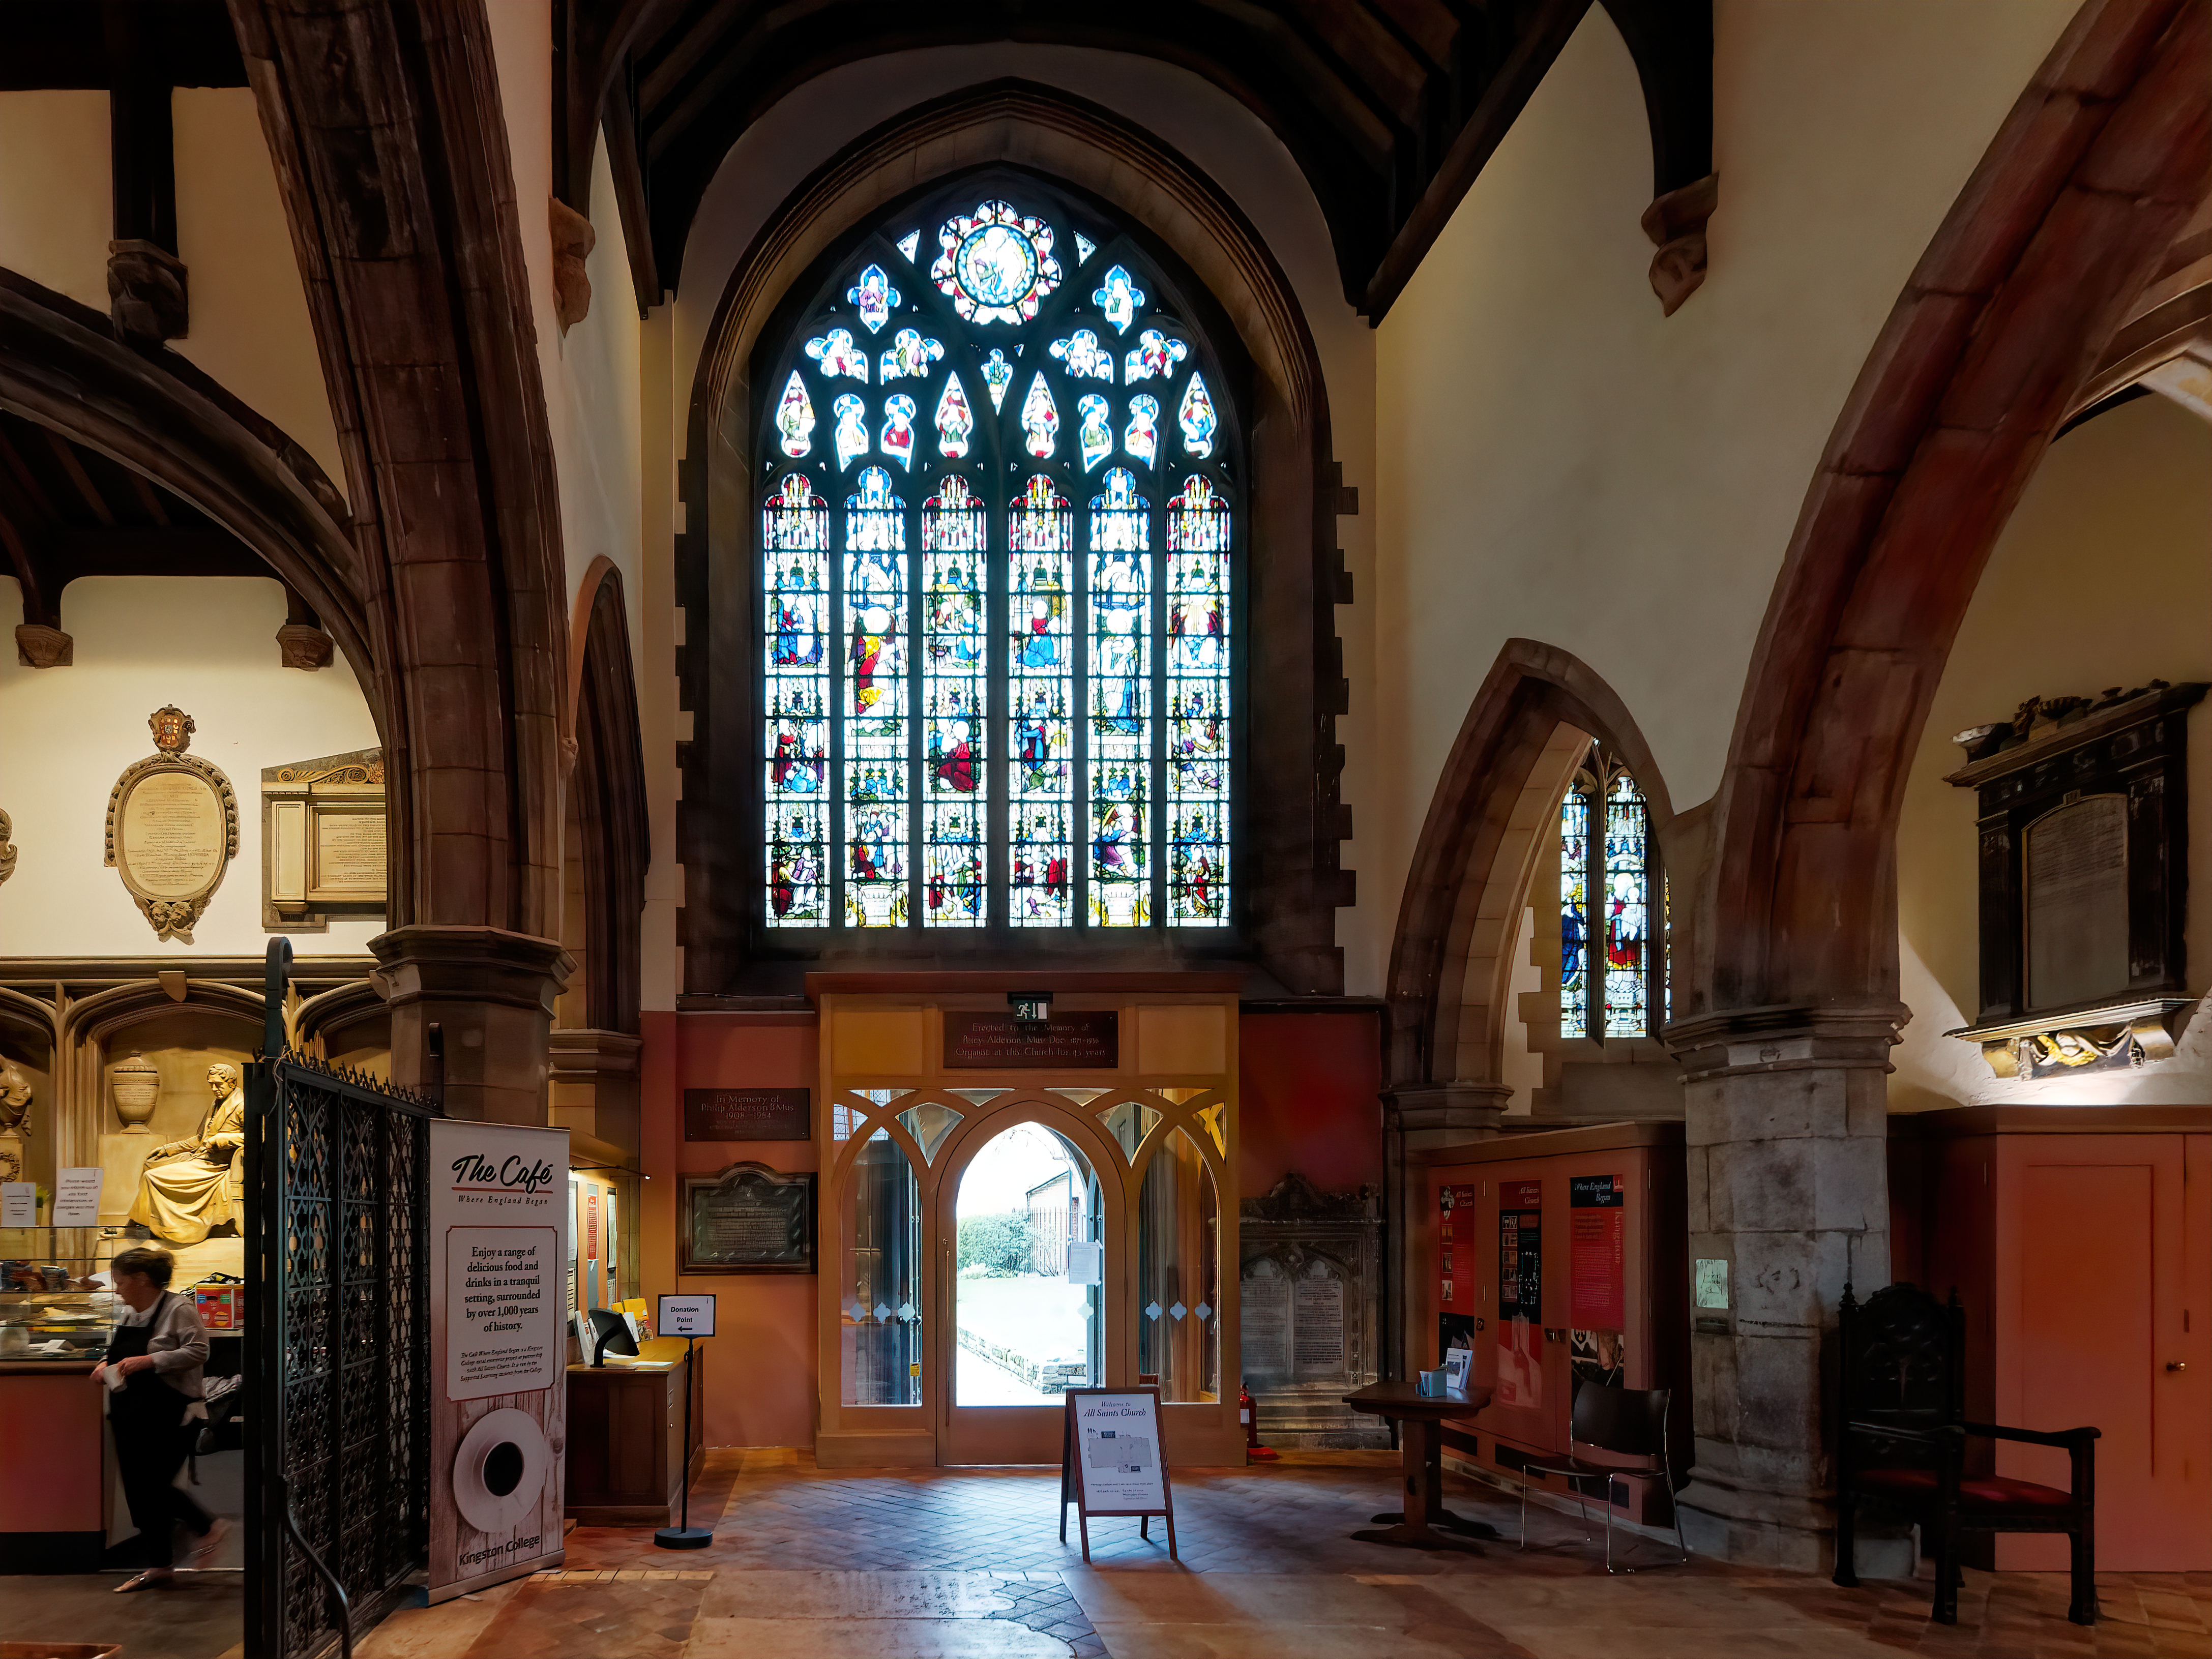
HDR from Skylum Software”s Aurora HDR 2019

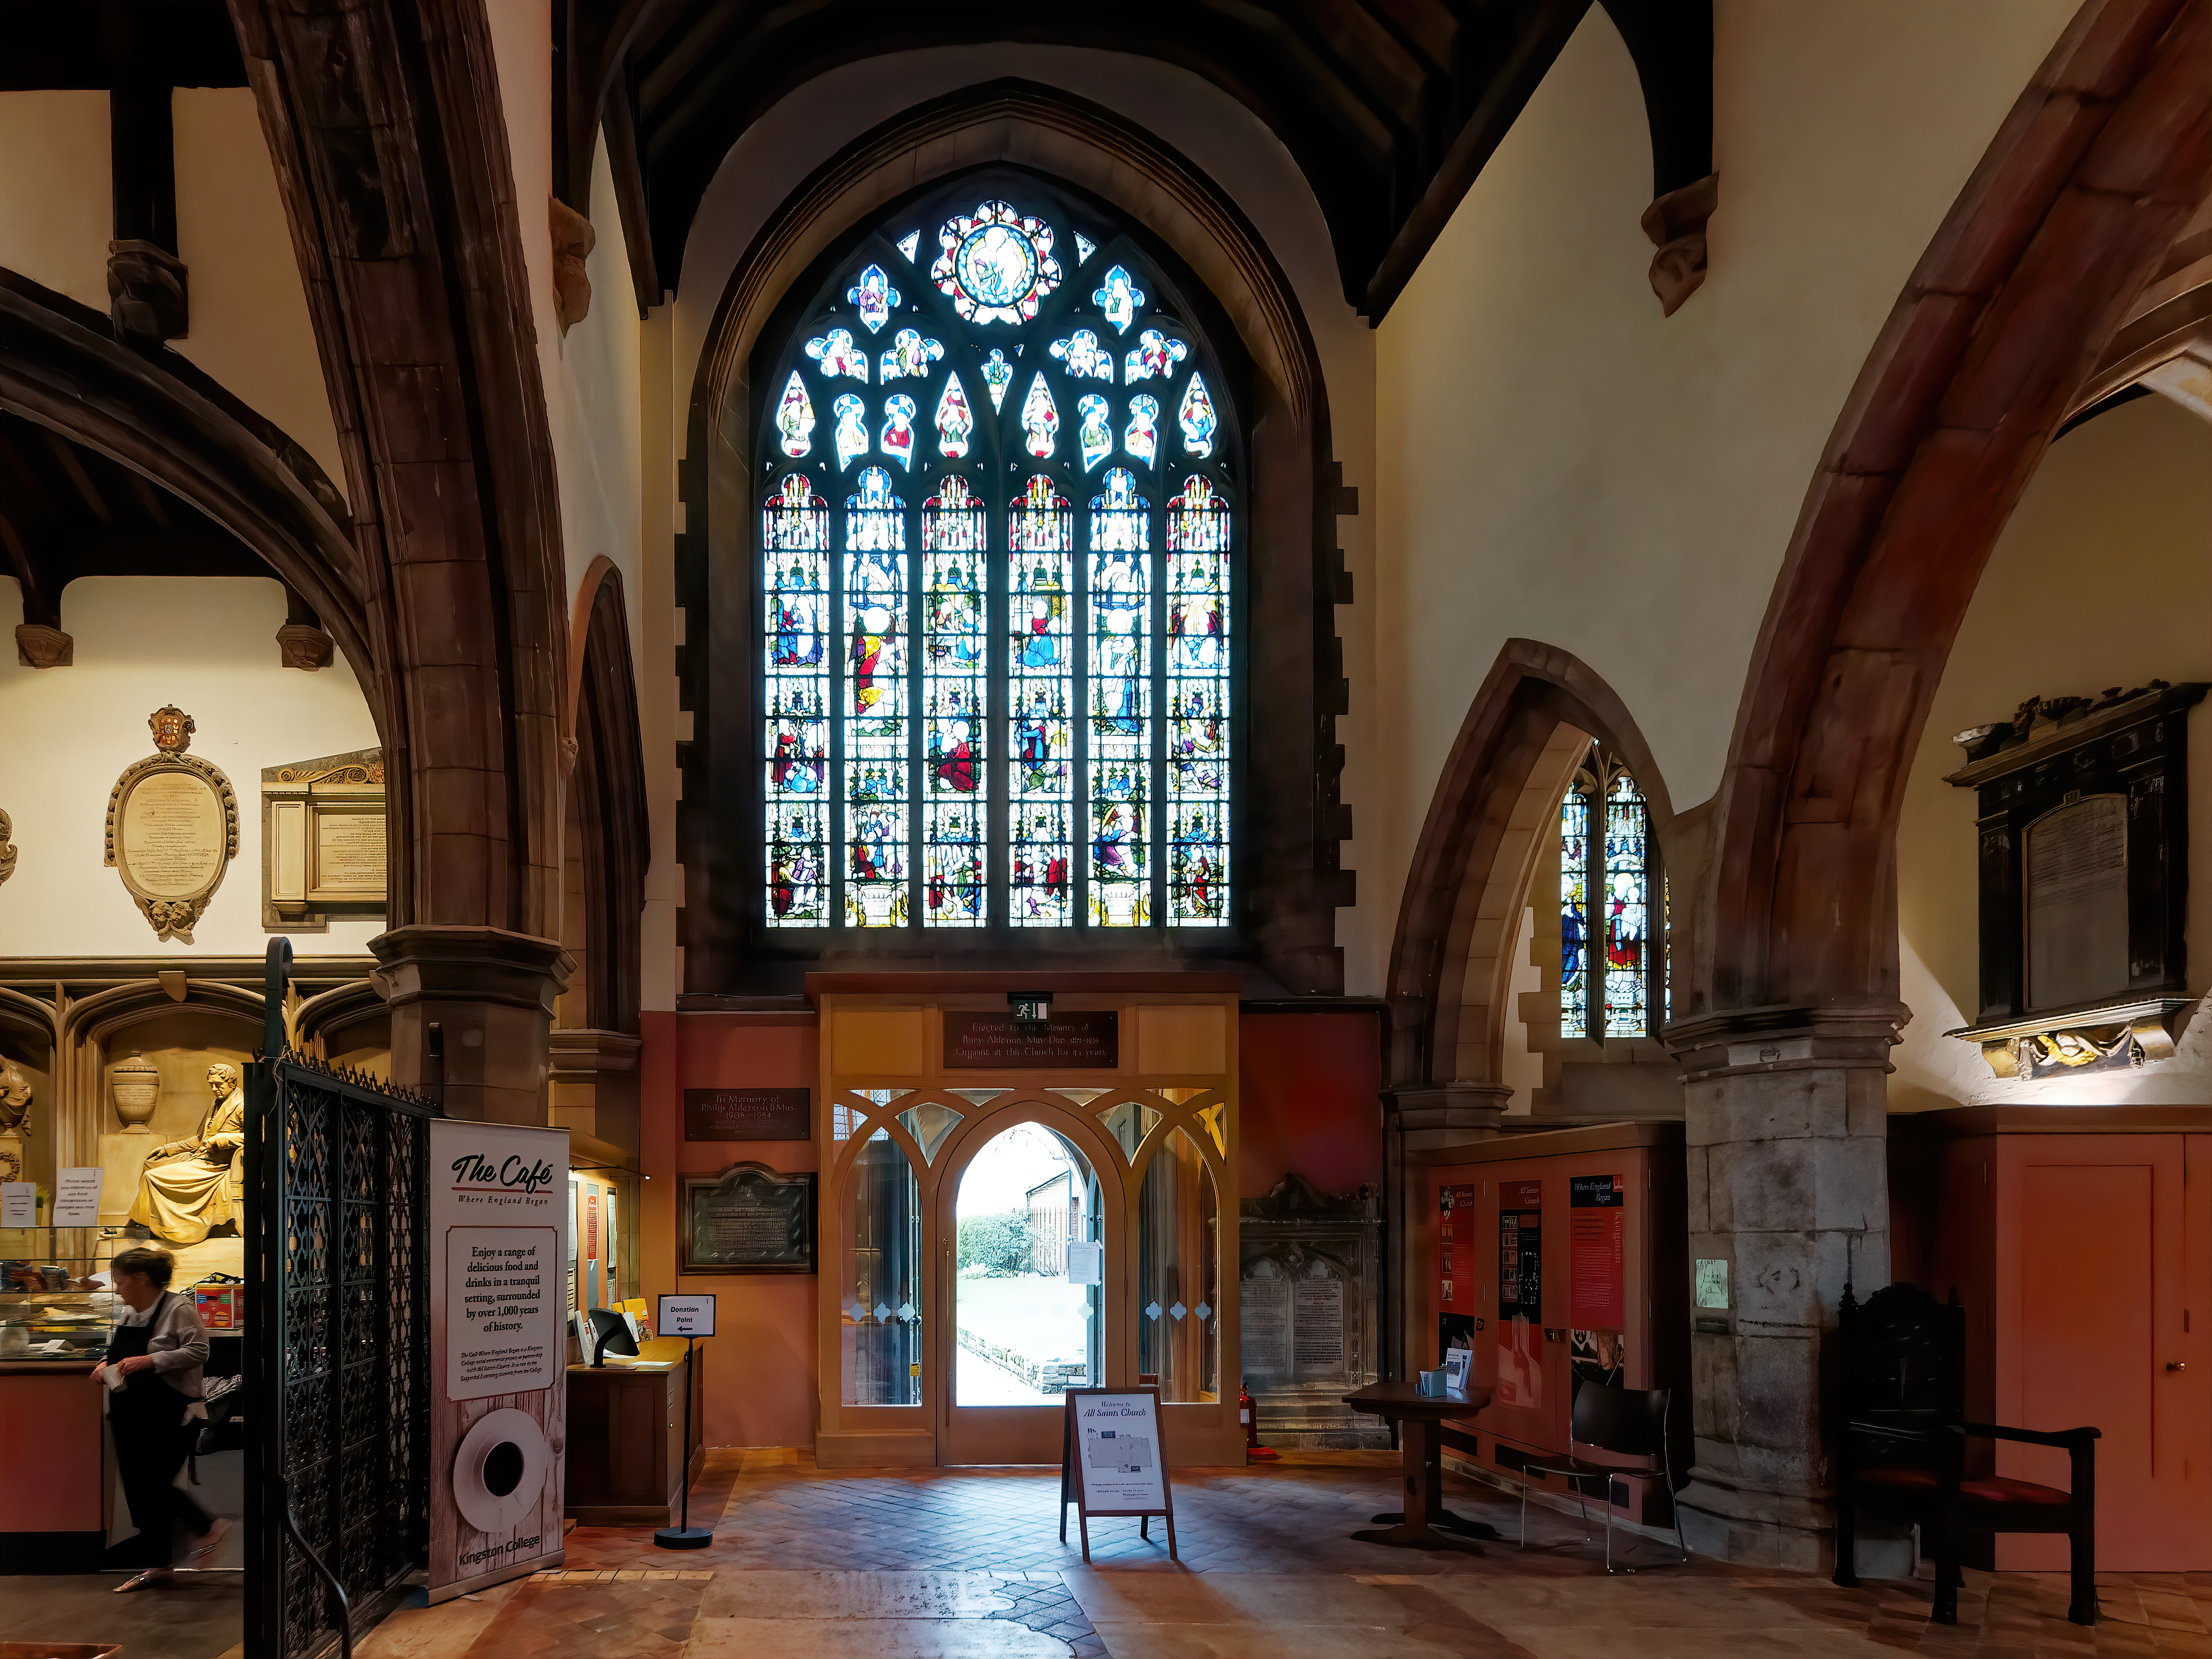
A few adjustment made to taste using Sklyum Software’s Luminar 3 including White Balance correction and here’s the final result. I also wanted to restore some of the colour and contrast in the stained glass window over the doorway.
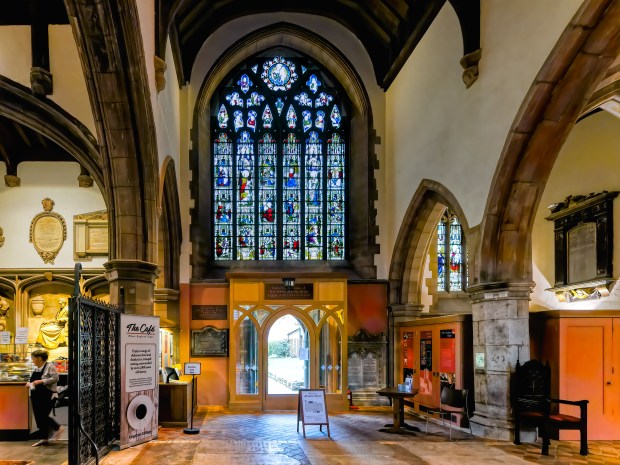
This was a quick edit but I think that it shows the awesome power of these Artificial Intelligence software products from these companies and the original image again for comparison.
Kind regards


Hi everyone,
Regulars to my blog will have noticed my recent postings regarding my membership of Skylum Software and Topaz Studio affiliate programmes.
This blog, my website/Pixels account, my domain names, my online gallery and my Flickr PRO account are, and have always been, paid for entirely out of my own pocket.
In joining these affiliate programmes anyone who decides to purchase any of their software products using one of my affiliate links provides me with a small commission which will help with my running expenses. I only associate myself with products that I personally use and that I’ve found to be well-designed, innovative and useful. Both companies offer trial versions of their software products on their websites.
I have a US$10 discount code which can be used when purchasing Skylum Software using my Slylum affiliate links and a 15% discount code which can be used when purchasing Topaz Labs software using my Topaz affiliate link.
I’ll keep everyone posted on any software updates, new products. deals, promotions, coupon codes etc. that come my way from both companies. I have added two new pages to my site menu so that I can publish information on Skylum and Topaz products.
Affiliate links:
Skylum Software – Aurora HDR 2019
Coupon codes:
Skylum Software products US$10 discount code – LEIGH10SKYLUM
Topaz Labs products 15% discount code – LEIGHTOPAZ
Please use my affiliate links to visit their websites to use these codes at the checkout.
Kind regards
Hi everyone,
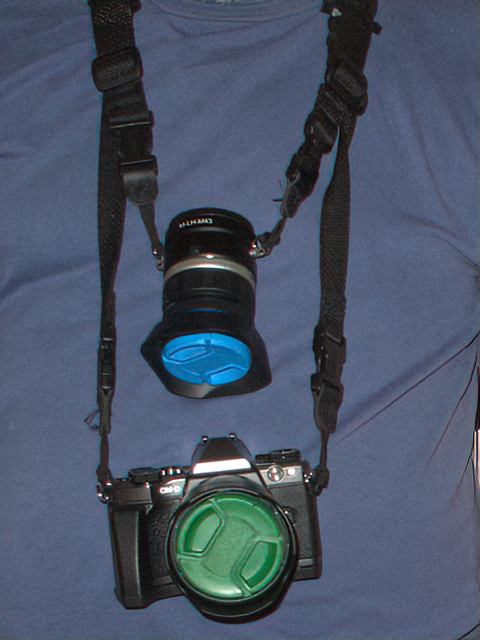
This works well, lens changer thingy plus my Op/Tech reporter/backpack straps attached to my Op/Tech camera strap and system connectors. They could be lengthened and adjusted as a matter of preference so that the camera is at the top and the lens is lower down if required as the system connectors fittings are interchangeable.
On further experimentation I have decided that, for me, it works better with the camera at the top, attached to the reporter straps and the lens changer below it attached to the camera strap but hey if I change my mind I can easily change them around. 🙂

Kind regard
Hi everyone,
My National Geographic backpack is great for packing everything in whilst travelling. It has a large compartment at the back which can take a 17 inch laptop which got me thinking so I started to look around for a small bag solution that would fold flat and go in the compartment so that I could decant my gear into a smaller, lighter carry around solution for every day use and I found this the Tenba Packlite Travel bag and BYOB padded insert, perfect for my needs, available in four sizes. Also useful as an everyday lightweight bag. Given my advancing years anything with the word weight involved gets my attention. 🙂 .
When going on a longer more distant trip where I don’t want to carry all my gear around every day then this will do the job. I have a couple of cheap lightweight inserts so I already know how much lighter they are compared to normal camera bags. With my camera gear being chosen in part for its light weight then it somewhat defeats the object carrying it in a heavy bag.
Kind regards
Hi everyone,
My lightest weight travel gear consisting of my Olympus OM-D E-M5 Mk 2 body plus M.Zuiko 9-18 mm and Panasonic 14 mm, 12-32 mm and 35-100 mm lenses weighs in at an amazingly light combined weight of approximately 900 grams (2 lbs) ! with battery and memory card fitted. Or, to put it another way, less than the weight of a bag of sugar!.
These lenses aren’t my fastest lenses but they are my lightest and cover 99% of my requirements. I don’t frequently require the “buttery smooth” bokeh that is so often raved about nor do I often require a shallow depth of field as most of my travel works are landscapes and I like to stop-down a bit, usually to about F5.6 or so. The exception to this being interiors where the light can and often is poor and I really don’t like flash so I’ll make the most of available light thus I pack my 14 mm Panasonic F2.5 which does the job nicely and serves as a one lens general purpose backup, I can live with the extra 2 ounces in weight 🙂 . Thanks to the Olympus’ amazing IBIS (in body image stabilisation) I rarely have to resort to increasing the ISO which is something I only do when there’s no alternative and only then by a stop or two at the most.
I’m firmly of the opinion that one can pay a fortune for the “best” lenses which are a stop or two faster and arguably sharper but it’s no fun carrying their extra bulk and weight around on foot all day long and the monetary saving is substantial to say the least. As for the difference in image quality between these lenses and their faster more expensive counterparts one has to pay a heck of a lot more money and the difference in image quality is in no way reflected in the price difference.


Panasonic LUMIX G 14mm F2.5

Panasonic 12-32 mm/F 3.5-5.6 LUMIX G VARIO MEGA OIS ASPH

Olympus M.ZUIKO Digital ED 9-18 mm 1:4.0-5.6
The above shots linked to full size images on my Flickr Page
As for my dream lens it’d be a zoom lens covering the above focal length range, weighing no more than their combined weight, ideally less, with equivalent sharpness and not appreciably larger than the largest of the lenses and of course at an affordable price, bring it on!. 🙂
Kind regards
![]()
Disclosure: This post contains affiliate links which means that I may receive a commission if you click on one of the product links and make a purchase. I only share products that I personally use and that I believe will be valuable to my readers. All opinions are my own.
Hi everyone,
I have setup a permanent US$10 off coupon code – LEIGH10SKYLUM which you can use if you are interested in purchasing their software. Remember that they have 30 day trials of their products available on their website and a 60 day money back guarantee. If your are interested in their products please use my affiliate links on the right or as below:
Please note that the above coupon code cannot be used during the sale but can be used at other times.
Many thanks to Skylum for the opportunity to test the new version in advance of release. They have added some great new features. Thanks to the team at Skylum for all their hard work on the new version and for listening to their users.
New Features:
Take advantage of these new features.
* SUBFOLDER MANAGEMENT. Subfolders make it easy to further organize your image library. These are folders nested inside other folders in your catalog and directly tie back to real folders on your hard drive.
* Subfolder creation. You can create a new by right-clicking on an existing folder in your Library.
* Subfolder deletion. It is possible to delete a subfolder as well by right-clicking on it in your library.
* LOCATE FOLDER. Have you moved or copied media to a new location? You can right-click on an offline folder and choose Locate Folder to select and reconnect files.
* ADDING FOLDER IMPROVEMENTS. Change your mind when adding a folder? Just click Cancel to stop the current task.
* OFFLINE FILE ALERTS. See a visual alert indicating unavailable files and folders.
* IMPROVED NAVIGATION. Quickly switch between Gallery and Single Image view with dedicated toolbar buttons.
* SHORTCUT KEYS. Take advantage of new keyboard shortcuts for View, Looks Navigation, Masks, Tools, and Edit.
* NEW LANGUAGES SUPPORTED. Use Luminar 3 in more languages with new localizations:
* Chinese Simplified
* Chinese Traditional
* Korean
* Portuguese
* Russian
* Italian
Performance Improvements
Get additional speed and performance from the Luminar 3 update.
* FASTER ADDING. You’ll see much faster load times when adding new photos and folders to the Catalog.
* FASTER LAUNCHING. When you return to Luminar 3, launch times are improved when reloading your Catalog.
* STABILITY. Thanks to our users for reporting different issues. This version of Luminar offers general stability improvements.
New Cameras Added
The following new cameras are supported by this recent update:
* NIKON
* Nikon D3500
* Nikon P1000
* Nikon Z6
* Nikon Z7
* PANASONIC
* Panasonic Lumix DC-LX100 II
* FUJIFILM
* Fujifilm GFX 50R
* Fujifilm X-T3
* SONY
* Sony RX100VA
* Sony RX100VI
* Sony DSC-HX99
* Sony DSC-HX95
* LEICA
* Leica M10-D
* Leica M10-P
* Leica D-Lux 7
Luminar 3 screenshots as supplied by Skylum. Click for bigger images.


Luminar 3 Top 10 Benefits (PDF File)
Hope this is of interest to you.
Kind regards
Hi everyone,
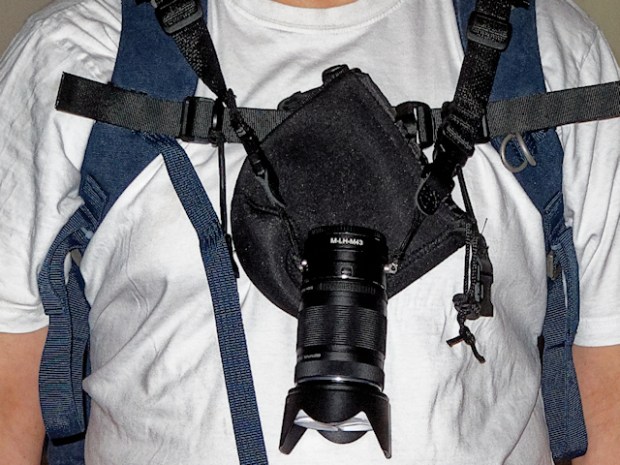
One thing that I’ve always found to be a real pain is fiddling around changing lenses, fiddling with lens back caps, juggling lenses and having to be constantly in and out of my camera bag etc., especially as I’m now using a backpack. With this in mind I thought I’d have a look around to see what was out there. I stumbled across the Movo Rapid Lens Changer. There are other makes out there, I chose this one because it was a fair price and got favourable reviews. This looked like it might be an interesting proposition.
The first thing that I did was dump the strap supplied with it and fitted Op/Tech Uni loop connectors to tie in with my other straps. Their strap just didn’t look like something that I’d trust with any of my lenses let alone my heaviest and best lenses, I might be right, I might be wrong, but either way I’m not prepared to take the chance.
I also wanted to avoid having the lens bouncing around on the move so I took one of my neoprene lens pouches and threaded the belt loop through the quick release sternum strap on my backpack. This provides a degree of shock and weather protection for the lens, it stops it bouncing about, prevents/negates the effects of accidentally depressing the lens release catch and it also gives a backup should any strap or fitting fail. As you’ll see in the picture below, the neoprene lens pouch needs to be a bit deeper to accommodate my longest lens with the lens hood fitted but that’s not a problem as these cases are very cheap.
One simply removes the lens from the camera, fits it to one end of the lens changer, flips the changer around, remove whatever lens is fitted to the changer and mount it to the camera and vice-versa. It’s also possible to have two lenses eg. small primes such as my M.Zuiko 12 mm, 17 mm, 25 mm or 45 mm or zooms attached one to either end of the changer and thus have two additional lenses to hand. I haven’t had the need for this as of yet but, if I do and with a longer lens pouch, this seems completely feasible.

Out of the pouch.
As usual, I mention that I have no affiliation with any manufacturer or product mentioned in this posting.
Kind regards
Hi folks,
Actually this post should be titled I’ve lost my grips, past tense, plural. Some while ago as a matter of personal preference I removed the grips from my cameras and replaced them with smaller third-party grips. The exception being my E–M1 which I don’t use as a travel camera.
The Olympus grips for my E-M5 Mk 1 and Mk 2 cameras have their good and bad points for me. The grips come in two parts, landscape grip and attached to that a separate portrait grip which is a good point. As I’m mostly interested in landscapes then the vast majority of my shots are taken in the landscape orientation, sure I will as a matter of course shoot in the portrait orientation when called for but having the portrait grip attached is just adding weight and bulk to beautifully small, lightweight camera bodies.
So, I removed the portrait grips and here’s the bad point, without the portrait grip attached with its in-built battery compartment then the landscape grip blocks the camera’s battery compartment and thus has to be detached and re-attached every time one needs to change a battery else I’d just leave it attached. I’ve found some third-party grips from Fotodiox in the States which negate this issue by having a cutout in the base plate so that the grip can be left attached and the battery can be changed. Else I can just see myself dropping the grip or stripping the tripod thread etc. and I don’t want to be constantly juggling the camera and the grip every time I change a battery.
When I looked at the new Olympus E-M1X with it’s non detachable grips this was sufficient reason in itself for it not to be of interest to me and my preferences and interests, add in it’s extra weight and of course it’s way too expensive for me. I’m hoping that Olympus take a few of it’s new features and incorporate them in to a new smaller body at a reasonable price tag and then I’d be more than interested.
Kind regards
